This is an old revision of the document!

(remove this paragraph once the translation is finished)
C11 & CGE PRO
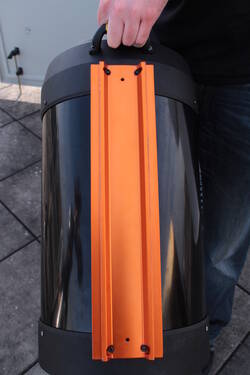
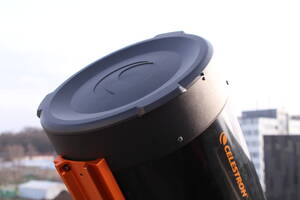
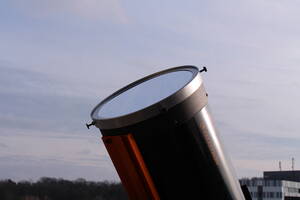
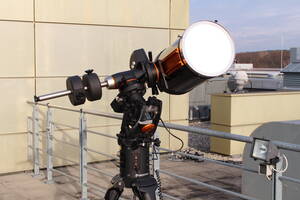
C11 is our second largest telescope and suitable for mobile use. For this it has to be reconstructed each time. To display and describe the details of this process is the purpose of this article.
Scattered pieces
To protect the sensitive electronics from weathering conditions they are stored in the lab course room. The remaining mechanical parts stay in the, so one must not carry them around every time.
Stored in the dome:
- the tripod
- the tube (C11)
- counterweights + bar
Stored in lab course room:
- CGE PROs electronic box
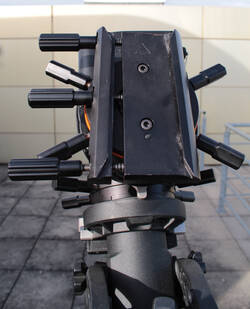
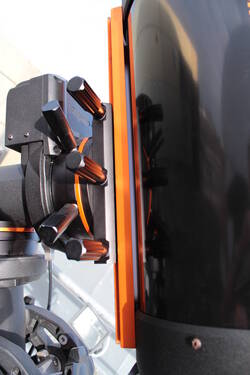
- CGE PRO mounting
- box containing all 1.4″ oculars and small pieces
- sun filter
Setup
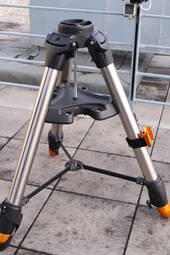
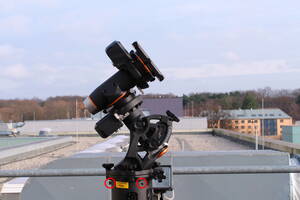
- The CGE PRO uses a parallactic mount and has to be adjusted to the northern direction. Therefore the tripod (see figure 1) should be positioned accordingly. To do so it is usually sufficient to point the tripod leg with the carrier for the hand terminal to the south.
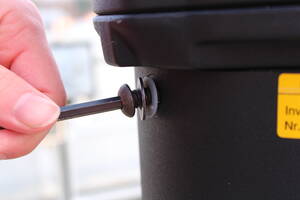
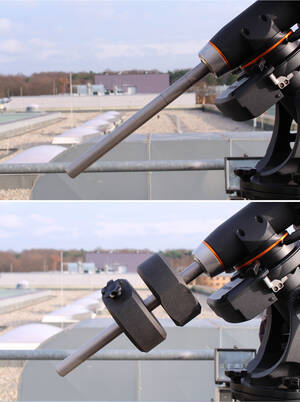
- Screw the counterweight bar into the mechanic and place the counterweights on it (see figure 6). When you fasten the screews on them, they are hold in place
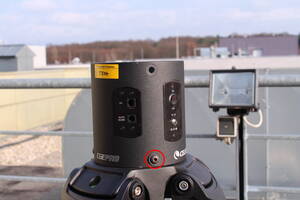
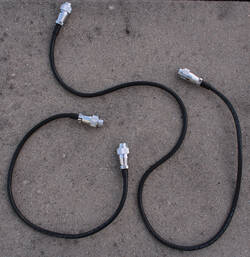
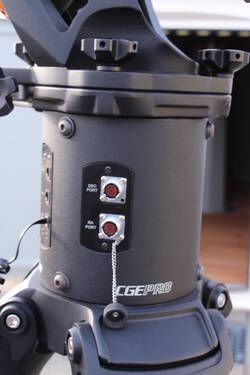
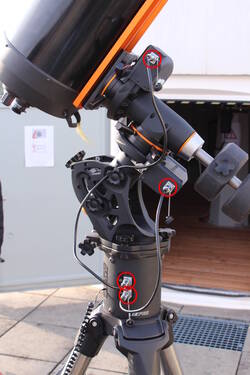
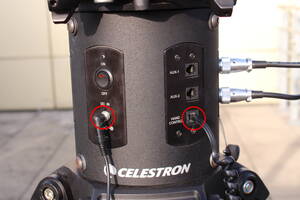
- Connect the electronic box to the engines of the mount. The cables <see imgref cables> go in the ports on the side of the electronic box figure 8 and have different length. The short one connects to the axis controlling the rec-ascension the longer one is for the declination (see figure 9). The cable only fit in one position.
- Now you can attach an ocular, a camera or a spectrograph to the tube. To use 2″ oculars or one of the other instruments you need to exchange the 1.4″ adapter at the end of the tube by a 2″ adapter from the storage container.
- Usually a focal reducer is already attached. If you don't want to use it, it has to be exchanged and a ocular adapter.
- Before using the telescope u have to tare the rotation axis. First lose the bolts fixing the rectascension axis, until you can freely move the telescope along this axis. Now adjust the position of the counterweights such that there is now movement along this axis any more. Tighten the bolts again and repeat this procedure for the declination axis. As there are now counterweights now, to taring the declination axis shift the tube in the mounting. Again this should be done by to people
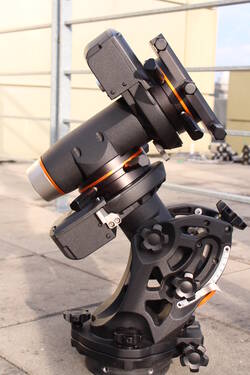
- Done! ( figure 18)
Start-up
The CGE PRO can simply switched on and off via the On/Off switch at the electronic box. In contrast to the OST, the CGE PRO does not require any shutdown procedure. It simply can be switched off. After the boot of the mount, it is almost always required to perform an alignment. The following possibilities exist:
- Two Star Align
- One Star Align
- Solar System Align
- Quick-Align
- Last Alignment
- Re-Alignment
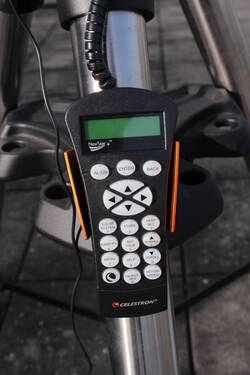
Unfortunately, the handling of the hand terminal of the CGE PRO is not as intuitive as the one of the OST. However, after a short settling in period also an inexperienced user can safely handle this mount.
Alignment
Nach einem erneuten Aufbau der Montierung muss in der Regel ein neues Alignment durchgeführt werden. Möchte man das Teleskop z.B. mehrere Nächte hintereinander verwenden besteht die Möglichkeit die Montierung in einen Hibernation-Modus zu versetzen (siehe unten), bei dem man die Montierung von der Spannungsversorgung trennen kann ohne das erstellte Alignment zu verlieren. Wird die Montierung immer an einem festen Ort verwendet kann ebenfalls auf ein gespeichertes Alignment zurückgegriffen werden.
Allgemeines Vorgehen:
- Montierung anschalten
- ENTER drücken um die Alignmentprozedur zu starten
- ENTER damit das Teleskop in die Ausgangsposition fährt (die sogenannten switch position)
- Datum eingeben
- Zeit eingeben
- Sommer- oder Winterzeit (Daylight Savings vs. Standard time) auswählen
- Zeitzone auswählen (+1)
- Alighnmentmethode auswählen
Nach einem zurücksetzen auf die Standardeinstellungen muss man neben den oben genanten Schritten ebenfalls den Standort neu festlegen. Dies kann entweder über eine Liste mit bekannten Orten oder über den Längen- und Breitengrad erfolgen.
Solar System Alignment
Das Solar System Alignment ist vor allem bei Sonnenbeobachtungen nützlich. Bei dieser Prozedur kann z.B. direkt die Sonnen benutzt werden um ein Alignment durchzuführen. Die in diesem Fall erreichte Qualität des Alignments kommt zwar nicht an ein Alignment heran, welches mittels mehrerer Sterne erzieht wurde, ist für unsere Sonnenbeobachtungen aber in der Regel vollkommen ausreichend. Damit die Sonnen für ein Aiignment verwendet werden kann muss das Anfahren dieser zuvor in den Einstellungen explizit erlaubt werden (UTILITIES → SUN MENU → ENTER). Neben den oben genannten Punkten müssen noch folgende Schritte für ein Alignment an der Sonne durchgeführt werden:
- Solar System Align auswählen (mit den ↑- und ↓-Tasten und nicht mit den NSWO-Tasten)
- Sun im Menü auswählen und mit ENTER bestätigen ⇒ daraufhin fährt das Teleskop die vermutete Position der Sonne an
- Sonne suchen und im Okular zentrieren (nicht wie von der Software empfohlen den Sucher verwenden, da wir für diesen kein Filter haben!)
- mit ENTER bestätigen
- ALIGN drücken ⇒ Fertig!
Two-Star Alignment
Das Two-Star Alignment bzw. dessen Verbesserung durch weitere Sterne ist die Standardprozedur für Nachtbeobachtungen. Neben den oben genannten Punkten müssen noch folgende Schritte durchgeführt werden:
- Two Star Align auswählen, das Teleskop schlägt daraufhin helle Sterne vor, die über den Horizont stehen
- den ersten Kalibrationsstern auswählen und mit ENTER bestätigen
- Stern im Okular zentrieren (den Sucher zu verwenden bringt in aller Regel nichts, da dieser meist nicht mit dem Tubus alignt ist)
- mit ENTER bestätigen
- ALIGN drücken, das Teleskop schlägt daraufhin den zweiten Kalibrationsstern vor
- Stern im Okular zentrieren (sollte man den Stern nicht finden kann über UNDO ein neuer Stern ausgewählt werden)
- mit ENTER bestätigen
- ALIGN drücken, das Alighnment kann anschließend durch hinzufügen weiterer Sterne verbessert werden (wenigstens 3 werden empfohlen, maximal 6 sind möglich)
- UNDO drücken um das Alighnment zu komplementieren
Hibernation
The hibernation modus offers the possibility to use the telescope several nights in a row, while switching off the power supply during the day. The hibernation procedure ensures that the alignment will be conserved. However during hibernation, it is not allowed to move the telescope at all. The following steps are necessary to put the telescope into hibernation:
- press the MENU button
- select HILBERNATE from the UTILITES menu
- move the telescope to the desired park position
- switch off the telescope
- disconnect the power supply and arrange for weatherproof cover (Important: do not move the telescope anymore!)
Wake up:
- reconnect the power supply
- switch on the telescope
- confirm Wake up with ENTER
- confirm the time and the location
- The telescope is ready for the next observation!
Troubleshooting
Known error sources and their solutions can be found here.
Additional documentation
More details on the CGE PRO and the C11 can be found in the corresponding manuals in the lab course room.
