Astro photography
The OST can, of course, be used for astro photography. Since three of our astro cameras are equipped with filter wheels, they can take pretty pictures – this article shall be a short manual for this and it shall document our progress in the=is field. It shall still grow, get more details etc., so it's not considered complete so far. 
The images can be found in our gallery – click on the pictures to see more details on their exposure time, filters, dates, etc.
Images with the CCD
Object selection
In general, the selected objects must be visible long enough at the night sky and not be too close to the horizon. The objects should be at least 20° above the horizon to reduce atmospheric effects. Please note, that Berlin is in eastern direction so light pollution is much stronger and conditions are generally worse in this direction. Furthermore, pay attention to the conditions during the observation: high seeing values and low sky transparency generally prevent deep sky observations. Observable objects include:
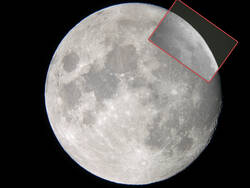
- the moon – too large for the field of view of our cameras → mosaic exposures
- planets – Mercury & Venus are close to the Sun → can only be observed close to daybreak or nightfall
- globular/open clusters (some open clusters are too big for the field of view of our cameras)
- galaxies – moonlight disturbs (also, e.g. M31 is too big for the field of view)
- nebulae – moonlight disturbs
- stars – well, photography of stars…
- useful webpages:
- further websites can be found here
Filter choice
There are several different filters available for our cameras. Please note, that filters have transmission curves that absorb most of the photons, so the exposure times are getting (much) longer. Depending on the object, some filters are more useful then others. For emission nebulae, e.g., narrow band filters (H-Alpha/Beta, OIII) are especially useful. For stars und galaxies, broad band filters (U/B/V/R/I) mare usually more sense. To construct a (pretty) RGB image later on, best use the B, V, and R band filters.
Exposure times
- extend here – maybe a small galery
- 40min exposure – stars until V $>$ 18mag can be observed
Correction exposures
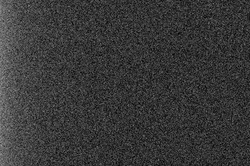
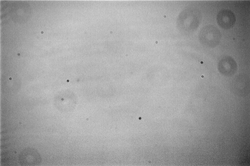
Correction exposures are necessary to correct the “science” exposures for interfering effects that are caused by the CCD or defects in the optics of the telescope. Darkframes are exposures without light entering the telescope. These exposures thus only count the electrons excited due to the temperature of the CCD and the bias current. These exposures (with the same exposure time as the “science” exposure) will be subtracted from the “science” exposures. Flatfieds are exposures of a uniformly illuminated wall, a part of the sky, clouds, or preferentially our flatfield foil. These exposures are used to correct for pollutions (dust grains) and effects of the optics (uneven illumination), by dividing the “science” exposure through the them.
Darkframes + Flatfields
- Darkframes
- attach the protective cover to the telescope
- switch off the light in the dome
- per filter (for the observation) take a number (3 or more) exposures with equal exposure times
- Flatfields
- select the same filter as used for the “science” observation
- attach (carefully!) the flatfield foil (from the lab room , 2.009) and switch it on (power supply in the locker in the dome)
- please note, the flatfield foil must evenly illuminate the whole aperture of the telescope
- take a number of exposures with short exposure times (around 3 seconds), prevent the camera chip from overflowing
Data reduction / Stacking
Data reduction by means of Fitswork:
- drop bad raw frames (note the total exposure time)
- create master dark(s) (for different exposure times)
- create master flats (for different filters)
- create master flatdarks (the subtraction of the flatdarks from the flats takes place automatically)
- subtract the master dark from the raw images
- divide that images by the corresponding master flats
- add up the images (in each filter)
- if needed, compensate for different exposure times
- mark two common objects in the images
- combine the exposures to a RGB-image (with offsets)
- if the offsets are not good enough, mark a characteristic region (e.g. a star) in the RGB-image and shift the color layers relative to each other
- define the background color to be black (right click) and maybe choose one star to define the white balance (right click)
- cut the image
Postprocessing
In the postprocessing one can adjust things like the contrast, the saturation, the hue, the white balance etc. to reveal more details.
- via Fitswork: Edit → Color functions
- via PS/Gimp …
Photography with a DSRL
We also have a Canon EOS 700D, which is a digital (single) reflex camera (DSLR). This camera allows for very short exposure times (until 1/4000s), while our CCDs only allow for a minimal exposure time of 0.09s. Accordingly, this camera is useful for objects that require short exposure times. Please note that those objects need to be bright enough for such short exposure times. The field of view of the DSLR is larger compared to the other cameras.
Interesting objects are e.g.:
- planets
- the Moon
- comets
We also have an article on controlling DSLR cameras using a computer 
Our new camera, the QHY600M, is a CMOS camera and therefore also allows much shorter exposure times than the old CCD cameras and on the other hand does not have the disadvantages of a DSLR camera, such as a high dark current. More about this when we have more experience… 
Lucky imaging how-to
This part will hopefully be filled soon…
Photography with a video camera
- we own one of these, too
To be continued…


